Difference between revisions of "Siege of AR-558"
(New page: When the Allies captured the Chin'Toka system at the end of 2374, one of the planets seized was AR-558. The Starfleet contingent which invaded the planet found that it housed a communicati...) |
m |
||
| (27 intermediate revisions by 4 users not shown) | |||
| Line 1: | Line 1: | ||
{{Infobox Battle | |||
|prev=[[First Battle of Chin'toka]] | |||
|conc= | |||
|next=[[Second Battle of Chin'toka]] | |||
|name=Siege of AR-558 | |||
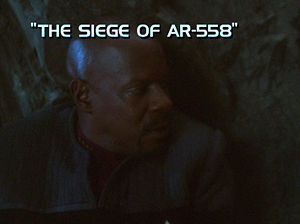
|image=[[Image:AR-558 title.jpg|300px|center]] | |||
|conflict=[[Dominion War]] | |||
|date=2375 | |||
|place=Planet AR-558 | |||
|result=[[Federation]] victory | |||
|side1=[[United Federation of Planets]] | |||
|side2=[[Dominion]] | |||
|commanders1=[[Benjamin Sisko]] | |||
|commanders2=unnamed [[Jem'Hadar]] commander | |||
|forces1=[[Starfleet]] [[Red Shirt|security personnel]] deployed as [[away team|ground troops]] | |||
|forces2=[[Jem'Hadar]] troops outnumbering the Federation force 3-to-1 | |||
|casual1=Substantial, but not specified | |||
|casual2=All troops lost | |||
}} | |||
The '''Siege of AR-558''' was a prolonged battle between the [[United Federation of Planets]] and the [[Dominion]] during the [[Dominion War]]. It is also the name of the [[DS9]] episode that depicts the resolution of the conflict. | |||
==Sequence of Events== | |||
The Federation took control of a [[Dominion]] communications facility five months prior to the events depicted in the episode. [[Jem'Hadar]] troops had been unsuccessfully attempting to take it back ever since. | |||
[[Captain]] [[Benjamin Sisko]] visited the planet to re-supply the Federation forces. Finding the troops there demoralized, he elected to remain on the planet indefinitely to assist them. | |||
The Jem'Hadar launched an assault to retake the the communications station. The Federation prepared an ambush for them at a choke point, but the Jem'Hadar managed to overrun the position. Fortunately for the Federation forces, the Jem'Hadar lost enough troops in the choke point that the Federation troops were able to defeat those remaining in the close combat that followed. | |||
==Significant Observations== | |||
* The Dominion employed cloaked [[mine]]s (called "houdinis" by the Federation troops) during the conflict. Hidden in [[subspace]], these mines would occasionally emerge into normal space, where they would explode if there were enemy personnel present. These mines are widely criticized as failures, since they did not actually deny Federation personnel passage through the mined area, merely causing a small number of casualties instead. The Federation troops eventually managed to gain control of the mines and turn them against the Dominion troops (yet another example of poor [[information security|computer securit]]y in [[Star Trek]]). | |||
* The [[Jem'Hadar]] used [[hologram|holographic]] troops to test the Federation's defenses without risking their own soldiers. This appears to be a unique occurrence. The information they gathered did not provide them any noticeable advantage, however, and holographic troops played no part in the final battle. | |||
* The Federation forces had no support weapons capable of holding the choke point against the Jem'Hadar charge. Critics have frequently observed that a couple of 20th-century machine guns could have filled the choke point with enough fire to completely deny passage to the Jem'Hadar. | |||
* Neither side had artillery weapons capable of bombarding the enemy from beyond line of sight. | |||
==External Links== | |||
* [http://www.startrek.com/startrek/view/series/DS9/episode/103945.html Synopsis] of the episode on StarTrek.com | |||
[[Category: Star Trek]] | [[Category: Star Trek]] | ||
[[ | [[Category: Battles]] | ||
[[Category: ST Episodes]] | |||
Revision as of 17:24, 15 December 2016
| |||||||||||||||||||||||||||||||||||||||||||||
| [Source] | |||||||||||||||||||||||||||||||||||||||||||||
The Siege of AR-558 was a prolonged battle between the United Federation of Planets and the Dominion during the Dominion War. It is also the name of the DS9 episode that depicts the resolution of the conflict.
Sequence of Events
The Federation took control of a Dominion communications facility five months prior to the events depicted in the episode. Jem'Hadar troops had been unsuccessfully attempting to take it back ever since.
Captain Benjamin Sisko visited the planet to re-supply the Federation forces. Finding the troops there demoralized, he elected to remain on the planet indefinitely to assist them.
The Jem'Hadar launched an assault to retake the the communications station. The Federation prepared an ambush for them at a choke point, but the Jem'Hadar managed to overrun the position. Fortunately for the Federation forces, the Jem'Hadar lost enough troops in the choke point that the Federation troops were able to defeat those remaining in the close combat that followed.
Significant Observations
- The Dominion employed cloaked mines (called "houdinis" by the Federation troops) during the conflict. Hidden in subspace, these mines would occasionally emerge into normal space, where they would explode if there were enemy personnel present. These mines are widely criticized as failures, since they did not actually deny Federation personnel passage through the mined area, merely causing a small number of casualties instead. The Federation troops eventually managed to gain control of the mines and turn them against the Dominion troops (yet another example of poor computer security in Star Trek).
- The Jem'Hadar used holographic troops to test the Federation's defenses without risking their own soldiers. This appears to be a unique occurrence. The information they gathered did not provide them any noticeable advantage, however, and holographic troops played no part in the final battle.
- The Federation forces had no support weapons capable of holding the choke point against the Jem'Hadar charge. Critics have frequently observed that a couple of 20th-century machine guns could have filled the choke point with enough fire to completely deny passage to the Jem'Hadar.
- Neither side had artillery weapons capable of bombarding the enemy from beyond line of sight.
External Links
- Synopsis of the episode on StarTrek.com
